INDEX
はじめに
Next.jsのページ遷移をする方法を学習しました。
その結果を執筆します。
routerオブジェクトとは
現在のページやリダイレクト、クエリパラメータ、ルートなど、アプリケーション内でのナビゲーションに関する情報を提供するためのものです。
やり方
1. ページ遷移 push
http://localhost:3000/のGo to SSG Pageをクリックすると、http://localhost:3000/ssgに遷移する
// useRouterをインポート
import { useRouter } from 'next/router';

const router = useRouter();
// pushの引数にページ遷移先を指定する
<button onClick={() => router.push("/ssg")}>Go to SSG Page</button>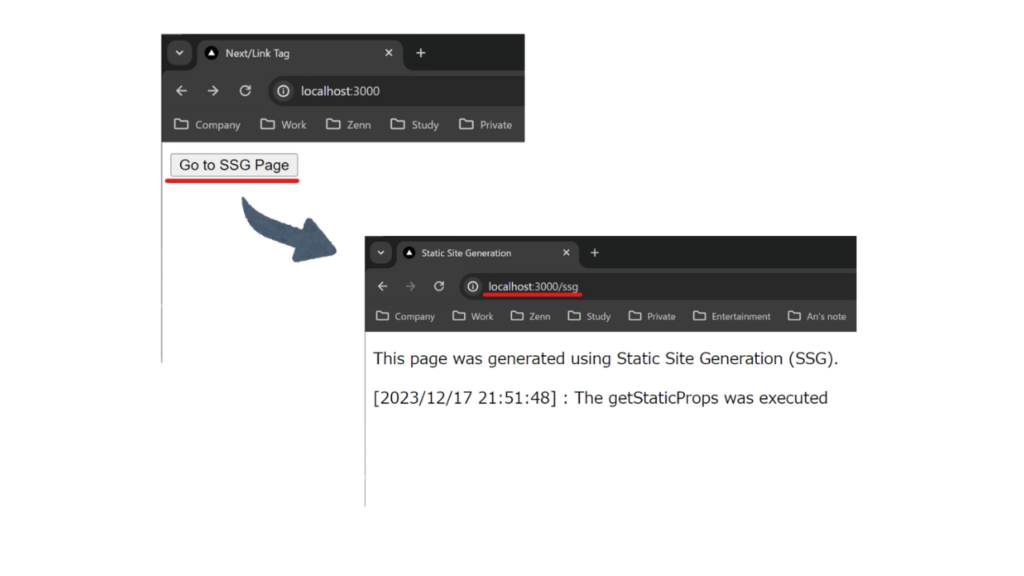
2. ページ遷移 reload
http://localhost:3000/のreloadをクリックすると、http://localhost:3000/に遷移し時間が更新する
// useRouterをインポート
import { useRouter } from 'next/router';

const router = useRouter();
// 引数の指定は不要
<button onClick={() => router.reload()}>reload</button>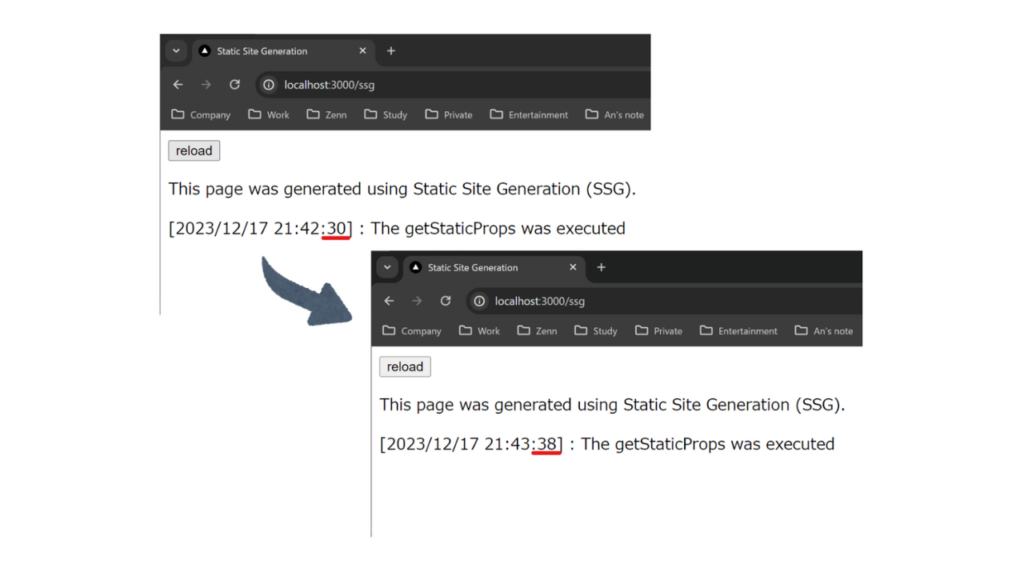
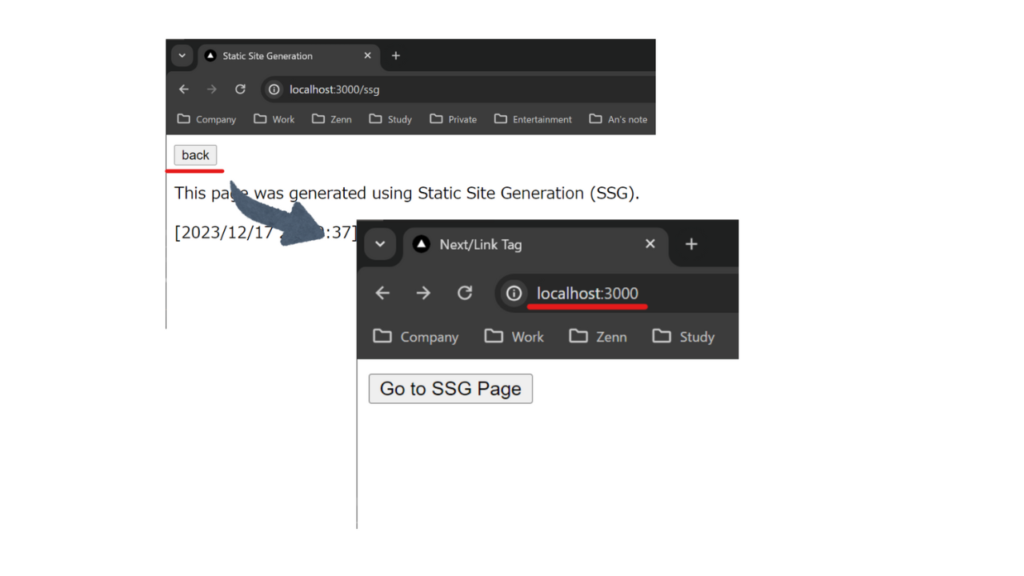
3. ページ遷移 back
// routerをインポート
import { useRouter } from 'next/router';

const router = useRouter();
// hrefにページ遷移先を指定する
<button onClick={() => router.back()}>back</button>http://localhost:3000/ssgのbackをクリックすると、http://localhost:3000/に遷移する